 Pin it
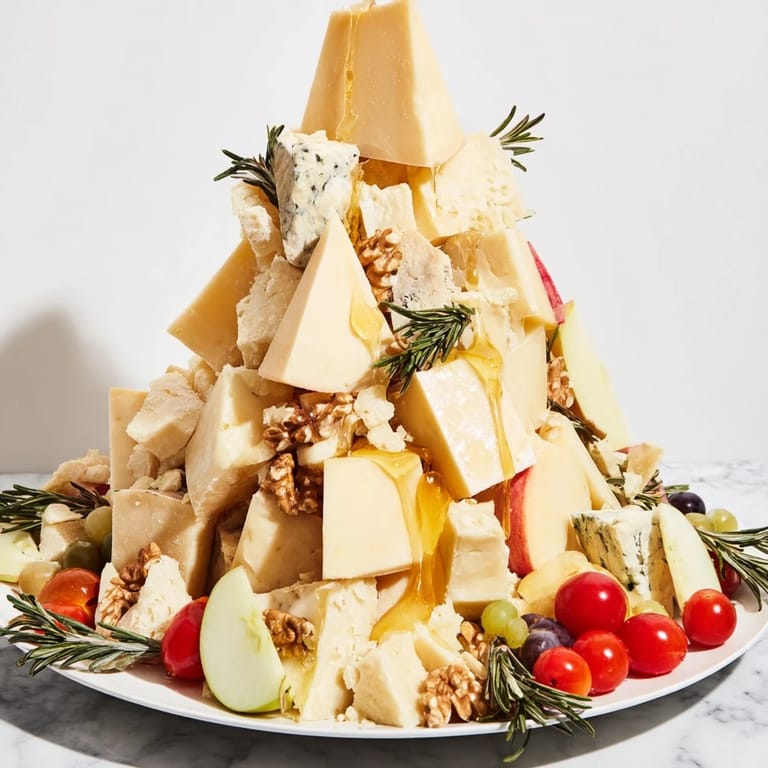
 I'll never forget the first time I created a cheese landscape instead of arranging a typical board. A friend was hosting a dinner party and asked me to bring something special, something that would make people pause before eating. I spent hours that afternoon stacking aged Manchego into dramatic peaks, nestling soft Brie into valleys, and suddenly I wasn't just arranging cheese—I was creating an edible landscape that made my guests gasp the moment they saw it. That experience changed how I think about entertaining, and now every cheese board feels like an opportunity to tell a story with food.
I made this platter for my sister's engagement party, and I watched her light up when she saw it. She brought her fiancé straight to the board, and they started pointing out the 'mountain peaks' and 'valleys' like they were exploring a real terrain together. That moment when food becomes an experience rather than just sustenance—that's what this recipe does.
Ingredients
- Aged Manchego (150g), cut into tall irregular chunks: This Spanish cheese is your foundation—its firm texture and nutty complexity hold up beautifully when stacked vertically, and it's visually stunning with its golden hue
- Parmigiano-Reggiano (150g), broken into rugged shards: The king of hard cheeses, its crystalline texture catches the light and demands to be noticed as a peak on your landscape
- Aged Cheddar (150g), sliced into tall triangles: Choose a sharp aged version rather than mild—the deeper color creates visual drama and the flavor complexity rewards exploration
- Brie (100g), cut into thick wedges: This creamy contrast to the hard cheeses becomes a visual 'valley' while offering a luxurious texture that softens as guests let it linger
- Gorgonzola (100g), broken into rustic pieces: The blue veining adds visual intrigue and a bold, salty note that anchors the entire flavor journey
- Red grapes (1 cup), halved: These jewel-toned fruits nestle naturally into valleys and provide refreshing bursts between cheese bites
- Cherry tomatoes (1 cup), halved: They add a pop of color and tanginess that cuts through the richness beautifully
- Cucumber (1 small), sliced into rounds: The coolness and crispness offer palate cleansing—think of these as refreshing streams running through your landscape
- Apple (1 small), thinly sliced: The subtle sweetness and crisp texture bridge the gap between cheese and fruit in the most elegant way
- Dried apricots (1/2 cup): These concentrated sweetness pockets provide textural surprise and warm color variation
- Roasted almonds (1/2 cup): They're your landscape's 'boulders'—scatter them for texture and for those moments when someone wants pure crunch
- Walnuts (1/2 cup): The earthier cousin to almonds, they add visual variation and a deeper nuttiness
- Thin baguette slices (12): These are the 'paths' through your landscape—choose quality bread that's been sliced thin so it stays crispy
- Assorted crackers (12): Mix your textures here—some seeded, some herb-infused, some plain—so guests have options for how they want to navigate
- Honey (2 tbsp): Drizzle this in small pools just before serving so it glistens; it's the unexpected sweetness that makes people close their eyes when they taste it
- Fresh rosemary sprigs: These aromatic 'trees' complete your landscape narrative and add a sophisticated herbal note
Tired of Takeout? 🥡
Get 10 meals you can make faster than delivery arrives. Seriously.
One email. No spam. Unsubscribe anytime.
Instructions
- Build Your Mountains:
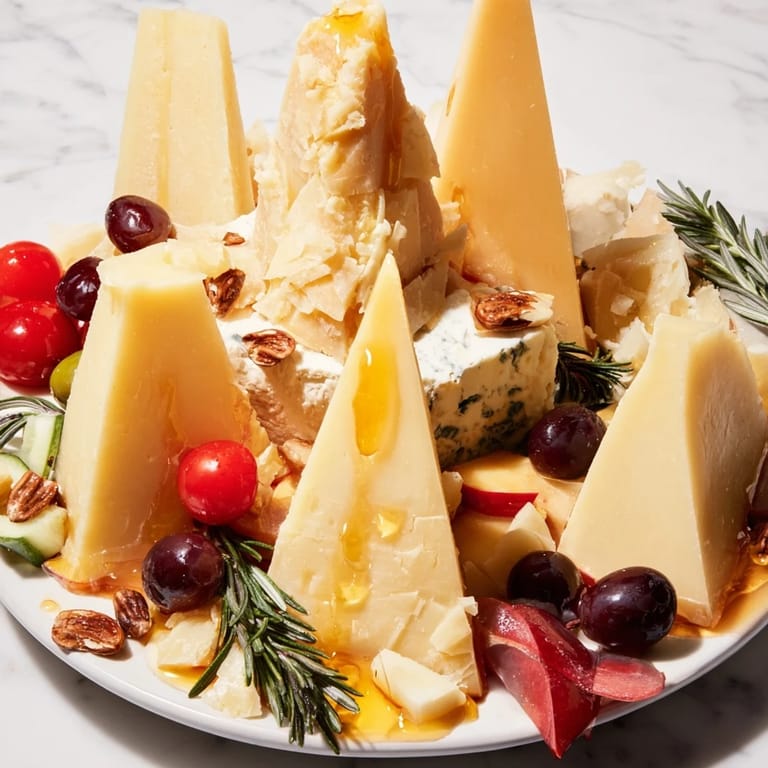
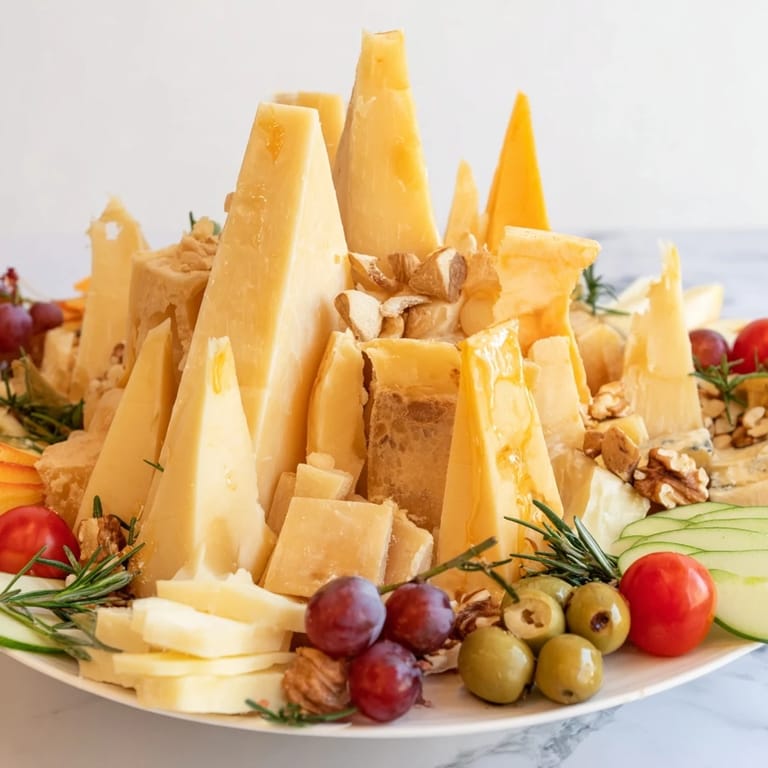
- Start with your largest board or platter—this is your canvas. Take those tall chunks of aged Manchego and stand them vertically, aiming for dramatic height and irregular angles. They should look like they're reaching toward the sky. Don't worry about perfection; the rugged quality is exactly what makes this work. Leave space around them because the empty room is part of the design.
- Create Your Hills:
- Now come the softer cheeses—thick wedges of Brie and broken pieces of Gorgonzola. Nestle these around the base of your hard cheese mountains, letting them settle naturally into the valleys you've created. These should look like they're supporting the peaks, creating a visual and textural transition.
- Fill the Valleys:
- This is where the magic happens. Take your grapes (halved so they sit flat), your cherry tomatoes, cucumber rounds, apple slices, and dried apricots and cluster them into the lower areas. Think of this like filling a landscape with water, vegetation, and life. Let colors find each other—reds next to greens, pale apple next to deep apricots. Don't overcrowd; some negative space keeps the eye moving.
- Scatter Your Boulders:
- Roasted almonds and walnuts go around the board in clusters, creating texture and the visual appearance of actual boulders on a hillside. This is intuitive—wherever you see a gap or a spot that needs visual interest, place a small handful here and there.
- Add Your Paths:
- Arrange your baguette slices and assorted crackers around the outer edges and between the cheese mountains, creating 'paths' through your landscape. These should be accessible, inviting your guests to use them as the vehicles for their journey through your creation.
- The Final Flourish:
- Just before serving, drizzle honey in small pools on or near the cheeses—let it pool naturally, catching light. Tuck fresh rosemary sprigs into crevices like little trees or herbs growing from your landscape. Step back and admire it—you've just created something beautiful.
- Serve with Intention:
- Set this in front of your guests and encourage them to explore it like a landscape, building their own perfect combinations as they go. The act of creating their own bite becomes part of the experience, and suddenly you're not just serving cheese—you're inviting them on a journey.
 Pin it
 The moment that made me realize this recipe was more than just a pretty presentation came when my grandfather looked at the board I'd created and said, 'You know, you can tell a lot about a person by how they arrange cheese.' He meant it kindly, and it stuck with me—this isn't just about the ingredients, it's about intention and generosity. That's when I understood that feeding people is an act of love disguised as hospitality.
Choosing Your Cheeses Thoughtfully
The cheeses you choose become the personality of your platter. Aged Manchego brings a warm, toasted nuttiness and a beautiful golden color that photographs like sunlight. Parmigiano-Reggiano is the showstopper—its crystalline texture and complex umami depth make it a cheese people remember. Aged Cheddar grounds everything with familiarity while still offering sophistication if you choose a well-aged version. The Brie and Gorgonzola provide textural contrast and emotional release; that moment when someone tastes the creamy Brie after the sharp Gorgonzola is when they understand why you arranged things this way. I've learned that mixing textures and aging levels matters more than having exotic varieties—good ingredients, thoughtfully combined, always wins.
Creating Visual Balance
There's a natural architecture to a good cheese landscape. The hard cheeses need height and presence; they're your anchors. The softer cheeses provide visual relief and create pockets of interest. Fruits and vegetables offer color gradients—reds and oranges warm things up, while the pale apples and green cucumber rounds create coolness. The nuts add texture and scattered interest. Think about color families naturally finding each other; reds with other reds, greens with greens, then let pale and warm tones bridge the gaps. I used to overthink this until a decorator friend told me to 'trust my eye and remember that nature doesn't arrange itself in perfect lines.' Now I arrange by what looks right, and it always is.
The Timing and Temperature Story
Assemble this platter no more than two hours before serving—the hard cheeses won't degrade, but the soft cheeses will begin to weep slightly, and the apple slices will start to oxidize. If you're serving this at room temperature, remember that softer cheeses are always more expressive and delicious when they've been at room temperature for 30 minutes before arrival, but Brie especially starts to break down if it gets too warm. The honey should be added just before serving so it stays viscous and glossy rather than soaking into everything. For wine pairings, this landscape works beautifully with crisp white wines that echo the fresh fruits, or light-bodied reds that won't overpower the delicate balance.
- Assemble maximum two hours before serving for peak visual appeal
- Let softer cheeses reach room temperature gradually before guests arrive for maximum flavor expression
- Drizzle honey and add rosemary as the final step, just as people are gathering
 Pin it
 Every time I set out a sculptural cheese landscape, I'm reminded that entertaining doesn't have to be complicated to be meaningful. This is about inviting people into your world for thirty minutes and making them feel like they're part of something special.
Recipe FAQs
- → How do I create the mountain peaks with cheese?
Use tall, irregular chunks of hard cheeses like Manchego, Parmigiano-Reggiano, and Cheddar, arranging them vertically to form dramatic peaks.
- → What fruits work best to create the valleys?
Red grapes, cherry tomatoes, thinly sliced apples, cucumber rounds, and dried apricots fill the lower areas and add fresh, sweet contrast.
- → How can I add texture resembling boulders?
Scatter roasted almonds and walnuts around the platter to introduce crunchy textures and visual roughness.
- → What accents enhance the flavor and look?
Drizzle honey in small pools or over cheeses and tuck in fresh rosemary sprigs to add natural aroma and visual interest.
- → Can I customize the cheese selection?
Yes, vary the cheeses to your preference or regional availability, trying different hard and soft varieties for unique flavor profiles.