 Pin it
 My coworker brought these to the office on St. Patrick's Day morning, and I watched grown adults light up like kids when they bit into one—that perfect moment when a cookie isn't just sweet, but actually memorable. She'd dusted them in this emerald sanding sugar that caught the fluorescent office lights, and honestly, I had to ask for the recipe right then. Now when March rolls around, I find myself in the kitchen with butter and green gel coloring, thinking about how something this simple can make people genuinely happy.
I made a triple batch one year for my daughter's classroom party, and the teacher emailed me that night saying they were the first thing to disappear from the dessert table. What got me wasn't just that they were eaten—it was that a few kids asked if they could trade their store-bought treats for one more cookie. That's when I realized these aren't just cookies; they're proof that taking an extra thirty minutes matters.
Ingredients
- All-purpose flour (2 1/2 cups): The foundation that keeps these cookies tender rather than cakey—don't skip the measuring spoon, just scoop and level.
- Baking powder (1/2 tsp): This small amount gives you lift without making them cake-like, so they stay soft and chewy at the center.
- Salt (1/4 tsp): Even in a sweet cookie, salt is your secret weapon—it balances the sweetness and makes every flavor pop.
- Unsalted butter (1 cup, softened): Softened means you can actually cream it properly, which traps air and makes the cookies tender; take it out of the fridge about an hour before baking.
- Granulated sugar (1 cup): Use regular white sugar here—it creates structure and helps the cookies spread just enough to be chewy at the edges.
- Egg (1 large): This binds everything together and adds moisture, so don't substitute or you'll end up with dry, crumbly cookies.
- Vanilla extract (2 tsp): Use pure, not imitation—you can taste the difference, especially when the frosting goes on.
- Almond extract (1/2 tsp, optional): A whisper of almond deepens the vanilla flavor without making the cookie taste like a different dessert entirely.
- Green gel food coloring: Gel won't water down your dough like liquid coloring does, so your cookies stay thick and sturdy.
- Green sparkling sugar (1/2 cup): This is the showstopper—it catches light and makes people want to eat them before they even taste one.
- Unsalted butter for frosting (1/2 cup, softened): Again, soft butter means smooth frosting without lumps or grainy texture.
- Powdered sugar (1 3/4 cups, sifted): Sifting breaks up clumps so your frosting is actually creamy instead of gritty.
- Milk (1 1/2 tbsp): This loosens the frosting to the perfect spreading consistency—use regular whole milk, not a substitute.
- Salt (pinch): A tiny bit in the frosting prevents it from tasting one-note and sweet.
Tired of Takeout? 🥡
Get 10 meals you can make faster than delivery arrives. Seriously.
One email. No spam. Unsubscribe anytime.
Instructions
- Heat your oven and prep:
- Set your oven to 350°F and line your baking sheets with parchment paper while you're thinking about it—this takes thirty seconds now instead of frantically searching for parchment later. I learned that lesson the hard way when I had cookies ready to go and no parchment in sight.
- Dry ingredients together:
- Whisk flour, baking powder, and salt in a medium bowl—this distributes the baking powder evenly so you don't get weird risen spots on your cookies. Set it aside and forget about it; you'll come back to it when you need it.
- Cream your butter and sugar:
- Beat softened butter and sugar for about two to three minutes until it looks pale and fluffy—this is where the magic happens, so don't rush it or cut it short. You should be able to see a noticeable color change, almost like pale whipped cream.
- Add the wet ingredients:
- Beat in your egg, then vanilla and almond extract—the mixture should look smooth and well combined. This is the point where your dough goes from plain to flavorful, so take a second to appreciate that vanilla smell.
- Bring in the green:
- Add your green gel food coloring a drop at a time, mixing until you reach the shade you want—too much and it gets neon, too little and people wonder if they're eating cookies or if it's just a trick of the light. I like mine a soft sage green rather than bright green, but that's purely personal.
- Combine wet and dry:
- Gradually add your flour mixture to the butter mixture, stirring until just combined—stop as soon as you don't see white streaks of flour anymore, or you'll end up with tough cookies. A soft dough should come together easily.
- Shape and coat:
- Scoop tablespoon-sized portions, roll them into balls, and immediately roll each one in green sparkling sugar—the heat from your hands helps the sugar stick better than if you wait. Place them two inches apart on your baking sheets, then gently flatten each with your palm so they bake evenly.
- Bake to perfection:
- Bake for nine to eleven minutes—and here's the thing that matters most: the edges should look set and slightly firm, but the very center should still look a tiny bit underbaked. They'll continue cooking on the cooling rack, and you'll end up with cookies that are crispy-edged but soft and chewy inside, not hard little hockey pucks.
- Make the frosting:
- Beat softened butter until it's creamy, then add your powdered sugar, milk, vanilla, and salt—beat until it's smooth and fluffy, about two minutes. If it seems too thick, add a touch more milk; if it's too thin, add a bit more powdered sugar.
- Assemble your sandwiches:
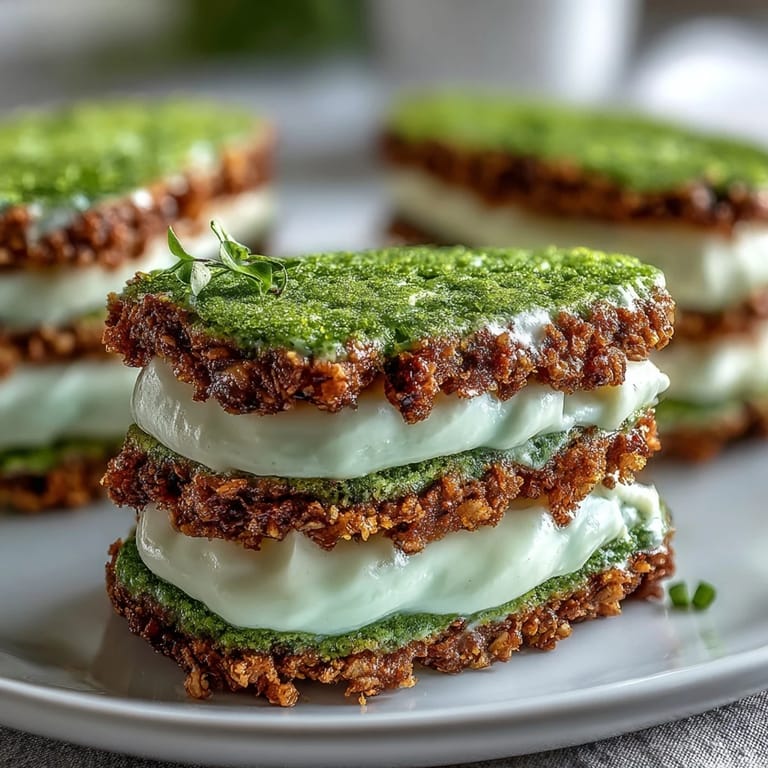
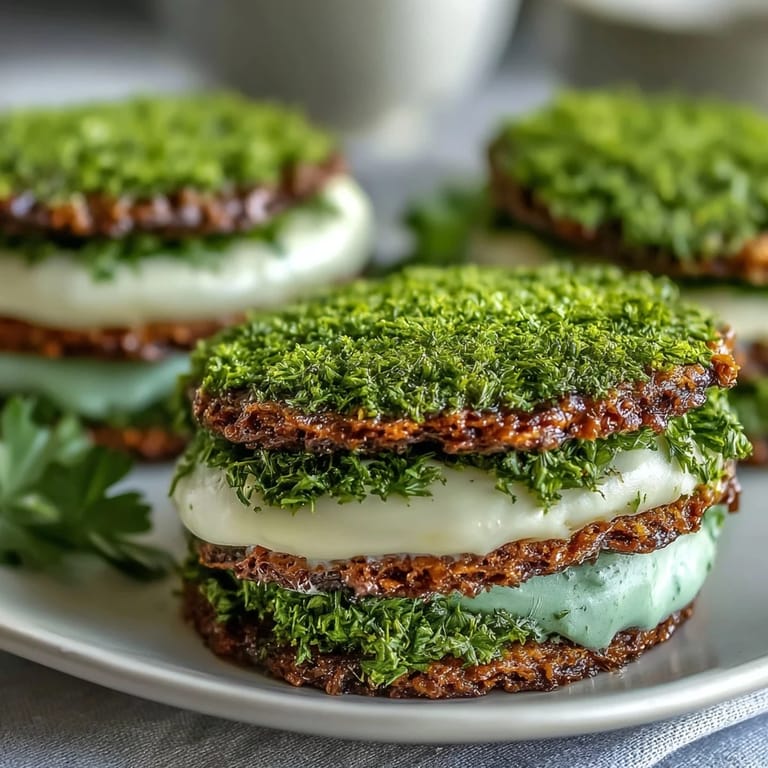
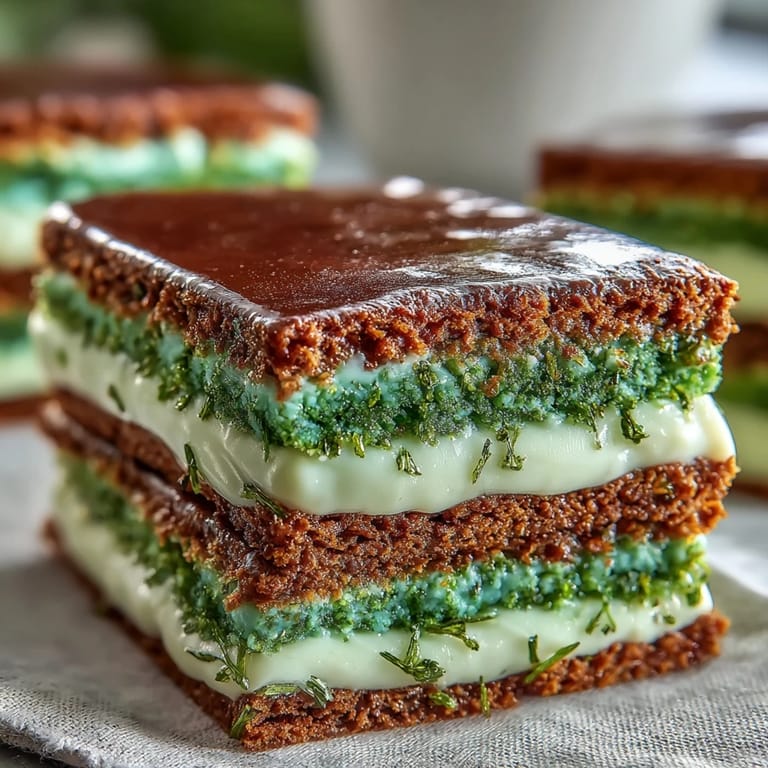
- Spread or pipe frosting onto the flat side of half your cookies, then top with the remaining cookies—you can roll the sides in extra sparkling sugar if you want them extra fancy. The frosting will squeeze out a tiny bit, and that's actually perfect because it seals the sandwich together.
 Pin it
 There's something about handing someone a cookie that looks this beautiful and watching their face when they taste the soft center and creamy frosting—it's like you've just handed them a tiny gift wrapped in sparkle. These cookies have a way of making ordinary days feel a little more intentional.
Storage and Make-Ahead Tips
I store these in an airtight container at room temperature, and they stay soft and perfect for up to three days—though honestly, they rarely last that long in my house. If you want to make them ahead, you can bake the cookies a day or two early, then assemble and decorate them the morning you're serving them, which means less stress when people are actually coming over.
Flavor Variations to Try
Once you make these once, you'll start seeing all the ways you can twist them—a friend of mine added a few drops of peppermint extract to her batch one year, and suddenly they tasted like Christmas in March. You could also experiment with the frosting: a touch of lemon zest, a splash of coffee, or even a hint of pistachio extract would all work beautifully with that soft green cookie.
Why These Cookies Actually Work
The secret to these cookies is that they're not too thick and not too thin—they're in that perfect middle ground where they stay soft inside while still having enough structure to hold frosting without falling apart. The sparkling sugar isn't just decoration; it adds texture and makes people actually want to eat them, which sounds obvious but makes a real difference in how memorable a cookie feels.
- The ratio of butter to sugar is generous enough that you taste richness without it being overwhelming or greasy.
- Baking them at 350°F instead of a higher temperature gives them time to cook through gently without browning too much, keeping them soft.
- Using both vanilla and almond extract creates a sophisticated flavor that feels special without being weird or overpowering.
 Pin it
 These cookies remind me why I love baking—it's not complicated, but it produces something that genuinely makes people happy. Make them once, and you'll understand why they keep coming back to my kitchen every St. Patrick's Day.
Recipe FAQs
- → What gives the cookies their green color?
Green gel food coloring is added to the dough to achieve a vibrant and consistent green shade without changing the texture.
- → Can peppermint extract be used in these cookies?
Yes, peppermint extract can be added for a festive twist, enhancing the flavor with a refreshing note.
- → How do I keep the cookies soft after baking?
Bake until edges are set but centers remain soft, then cool completely on a wire rack to maintain tenderness.
- → What is the best way to assemble the sandwich?
Spread or pipe the creamy vanilla frosting onto the flat side of half the cookies, then sandwich with the remaining cookies and optionally roll edges in sparkling sugar.
- → How should these treats be stored?
Store in an airtight container at room temperature for up to 3 days to maintain freshness and texture.